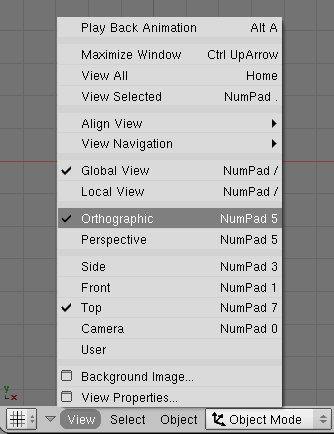
Blender (jusqu'à 2.49)
Curve Nurbs and Bezier
To carry out a Celtic knot
 (version française)
    Début   Index
previous
 Mdg: celtic 2 next 

Curve Nurbs and Bezier,   to design a 3D celtic knot
 
Caution : The purpose of this tutorial is not to exactly reproduce the model above but to make comprehensible the employed method .  Every one is free then to develop his own "arabesques" .

A/ Choosing the best orientation to start
B/ Creating a profile 
C/ Handly spliting the shared data
D/ Spliting shared data with a script 
E/ Modeling 
F/ Download the basic file (and the more complex one too)

Choosing the best orientation to start 
1/  At the beginning, check that you are in the ortho/ top view :

2/ Recenter the view and the 3D cursor  with  Alt-CKEY

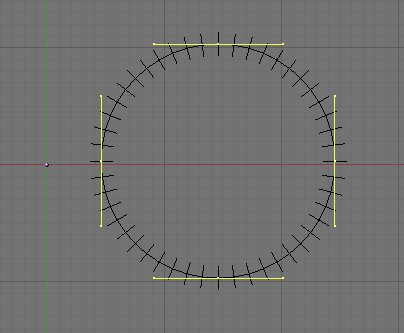
3/ Add a NURBS or Bézier curve (no matter what the type it is) :

The choice of the circle is arbitrary, you can take a free curve as well and add as many vertices/nodes as you want.  With an already built form, you gain a little time and avoid the process of looping with CKEY .

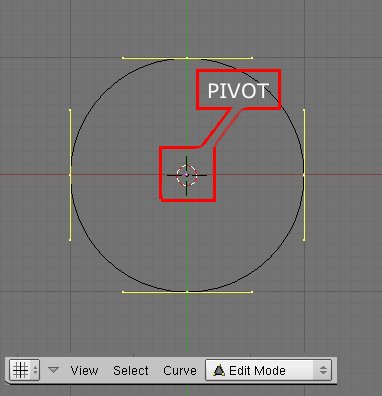
4/ We have to select all the nodes and shift the circle towards the right (or the left,  in this tutorial, the direction of reading is privileged  to facilitate comprehension but in a real modelling, one is completely free to take a direction or another).

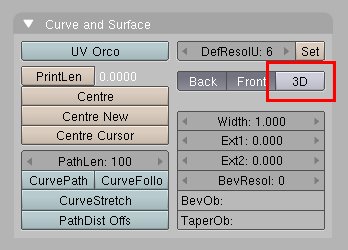
5/ In the Editing buttons window, F9key, set the curve's [3D] property:

...  otherwise it will remain plated in the plan [ XY ] .

Create a profile 
6/ Get out of the Edit : TABkey .
7/ Add a second circle (bezier or nurbs, no matter).:

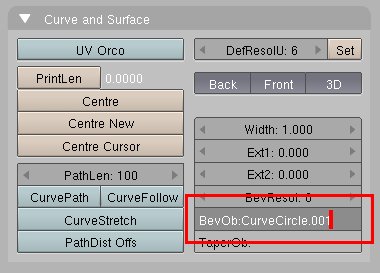
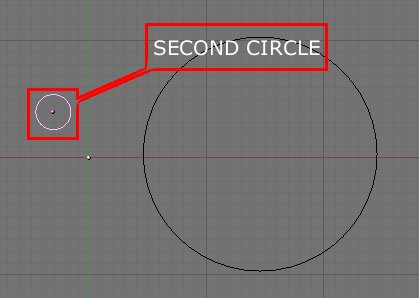
8/ In the Editing buttons window, F9key,  note its name carefully .

9/ Select again the first circle:

10/  In the Editing buttons window, F9key, modify the field  [BeVOb] with the name of the second circle.
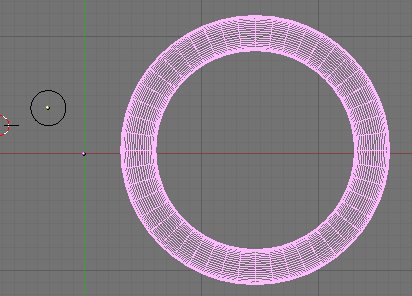
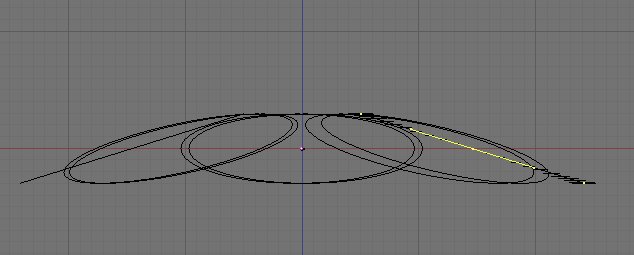
Normally, you must see a volume appear:

You can move without any danger the small circle, the profile, in another layer.  The process is simple:  select  the object and MKEY, we chose layer 2, as you see in the picture below (the afficionados of blender often put the objects of this type in the last  layer).  Do not forget to push the [ OK ] button before to leave this window.

Spliting shared data 
11/ Copy the ring in Linked mode  :
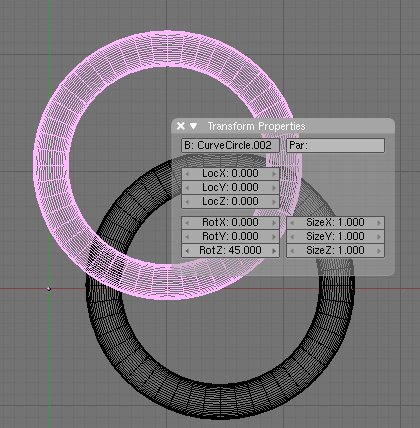
You can use the short key Alt-D.
12/ Modify the location of this copy in entering  45 degrees of rotation on the Z axe, you do so in the field "RotZ"of the "Transform Properties"  panel that can be displayed with NKey  :

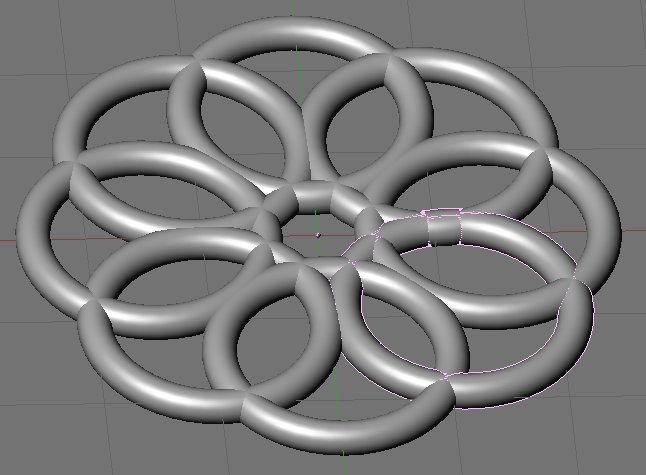
You do the operation above mentionned 7 times by increasing the value of 45 degrees at each step (45, 90,135, 180...): 


You can also do it  much faster  by using a python script ::
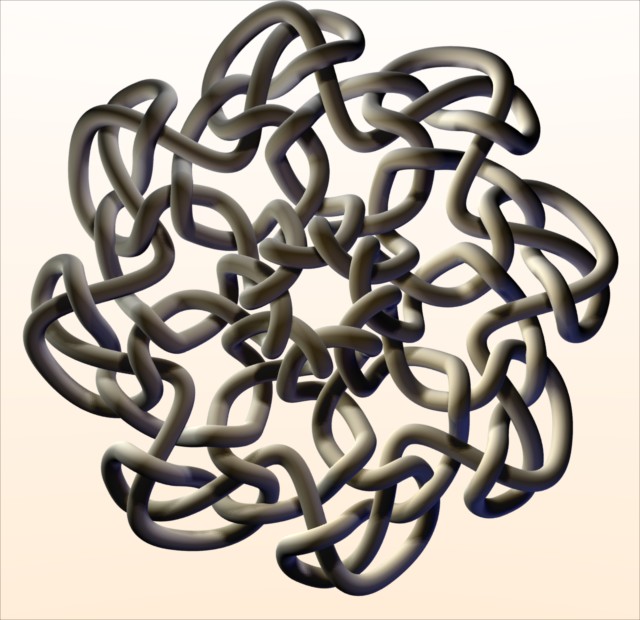
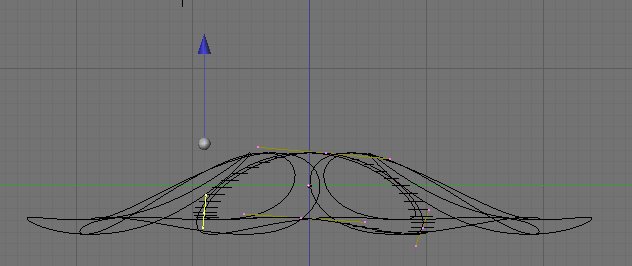
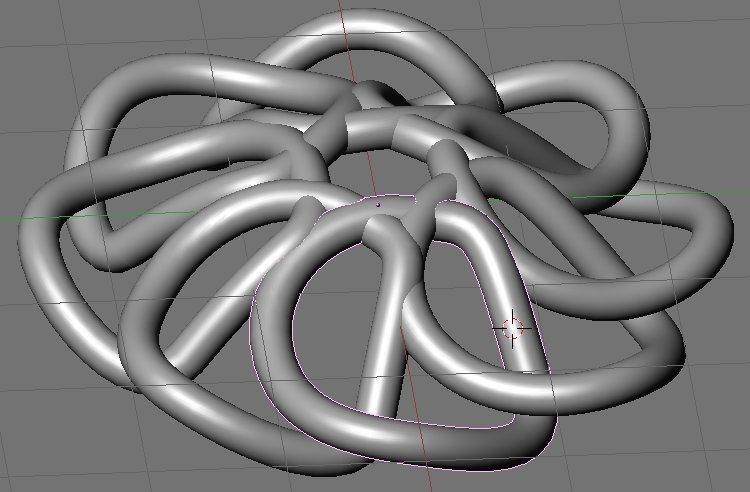
import Blender
from Blender import Object
from math import pi
scene=Blender.Scene.getCurrent()
OBJ=Blender.Object.GetSelected()[0].name
division=8

for n in range(1,division):
 Op=Blender.Object.New('Curve')
 Op.shareFrom(Object.Get(OBJ))
 Op.RotZ=n*pi/(division/2)
 scene.link(Op)
Blender.Window.RedrawAll()

Modeling
13/  All the secret of this technical lies in the use of shared data.  So , there is no other solution than to carry out the modifications in Edit mode.

 
You must also stay in  wireframe display mode to be able to locate  the positions of the other curves.  Each displacement,rotation or scaling will be automatically passed on all the other curves.


This part of the realization stays very "artistic".  One must proceed by slight transformations and leave the Edit mode to judge of the result . 

With a lot of  patience you can obtain the following result :
 

Download the file, simple version
Download the file, complex version 
précédentScript Python
 Mdg: celtic 2 next 
Vers le  Haut de page

Les questions concernant cette page  peuvent être posées sur  :
 news://news.zoo-logique.org/3D.Blender


Livre en français
Blender : apprenez, pratiquez, Créez, livre, Ed. Campus Press, coll. Starter Kit
Blender Starter Kit

Forum
FAQ
Lexique
Didacticiels
Compilations
Blender2KT
Débuter
Modelage
Blender python
Materiaux
Lumière
Animation
API python (eng)
Archives nzn
Statistiques
Doc flash Sculptris
Galerie Sculptris

mon site de démos sur youtube